How to Import Outlook for Mac Folder to Apple Mail on MacBook?
Get MacMister OLM Converter Tool to Precisely Import Outlook for Mac folder to Apple Mail on MacBook with Emails & Attachments
Share this Post to earn Money ( Upto ₹100 per 1000 Views )
Are you moving to Apple Mail on a new Mac OS? Wondering about old files archived from Outlook for Mac? No sure how to import Outlook for Mac folder to Apple Mail on MacBook easily? Looking for a simplified and trouble-free way for the same? No worries because in the section we will discuss a method that will effectively import Outlook for Mac folder to Apple Mail on MacBook with accurate emails and attachments. Let’s understand the entire process by using a common scenario that most of the user’s deals with when they move to new email application.
Common Query:
I recently moved to a new MacBook where I have configured an account in Apple Mail. On my previous system I was using Outlook for Mac so before moving to my new Mac machine I exported my entire essential data from Mac Outlook to OLM. Now I need to move these files into my new Apple Mail account but I don’t know how. I want to execute the task as soon as possible. If anyone could suggest me a safe method for the process, I would be really grateful!
Microsoft Outlook is a commonly used email application. It is compatible with both Mac & Windows OS and is quite popular as personal information manager. On both the platforms, the email client has gained accolades for its exceptional working and features.
The only reason why users choose Apple Mail when they move to a new Mac OS is because it is already available on most of the Mac devices and is easy to setup. Whereas, Outlook for Mac need to be specially downloaded and installed on the system. This consumes users’ lot of time and efforts. Therefore, Mac users will not think twice while configuring Apple Mail platform to manage day-to-day emails.
Both the email applications are similar when it comes to email management. The only problem is how to import Outlook for Mac folder to Apple Mail on MacBook. Because Outlook for Mac stores its users database in OLM and Apple Mail archive users files in MBOX. So, accessing OLM files in Apple Mail is challenging. One should perform the conversion of OLM to MBOX first to import Outlook for Mac folder to Apple Mail on MacBook.
How to Import Outlook for Mac Folder to Apple Mail on MacBook?
The easiest way to import Outlook for Mac folder to Apple Mail on MacBook is MacMister OLM Converter for Mac. With the help of the solution, users can batch convert OLM to MBOX at once and save their time and efforts. It’s simple and friendly GUI is easily operable by all professional and non-professional users. Even the tool is equipped with three operational which takes few seconds to complete the whole process accurately.
Moreover, there are many features present with the help of users can import Outlook for Mac folder to Apple Mail on MacBook according to their requirements. Download the trial edition for free and check the step-by-step procedure of the application for free.
Working Steps to Import Outlook for Mac Folder to Apple Mail on MacBook
Step 1. Download, install, and run the application on MacBook.
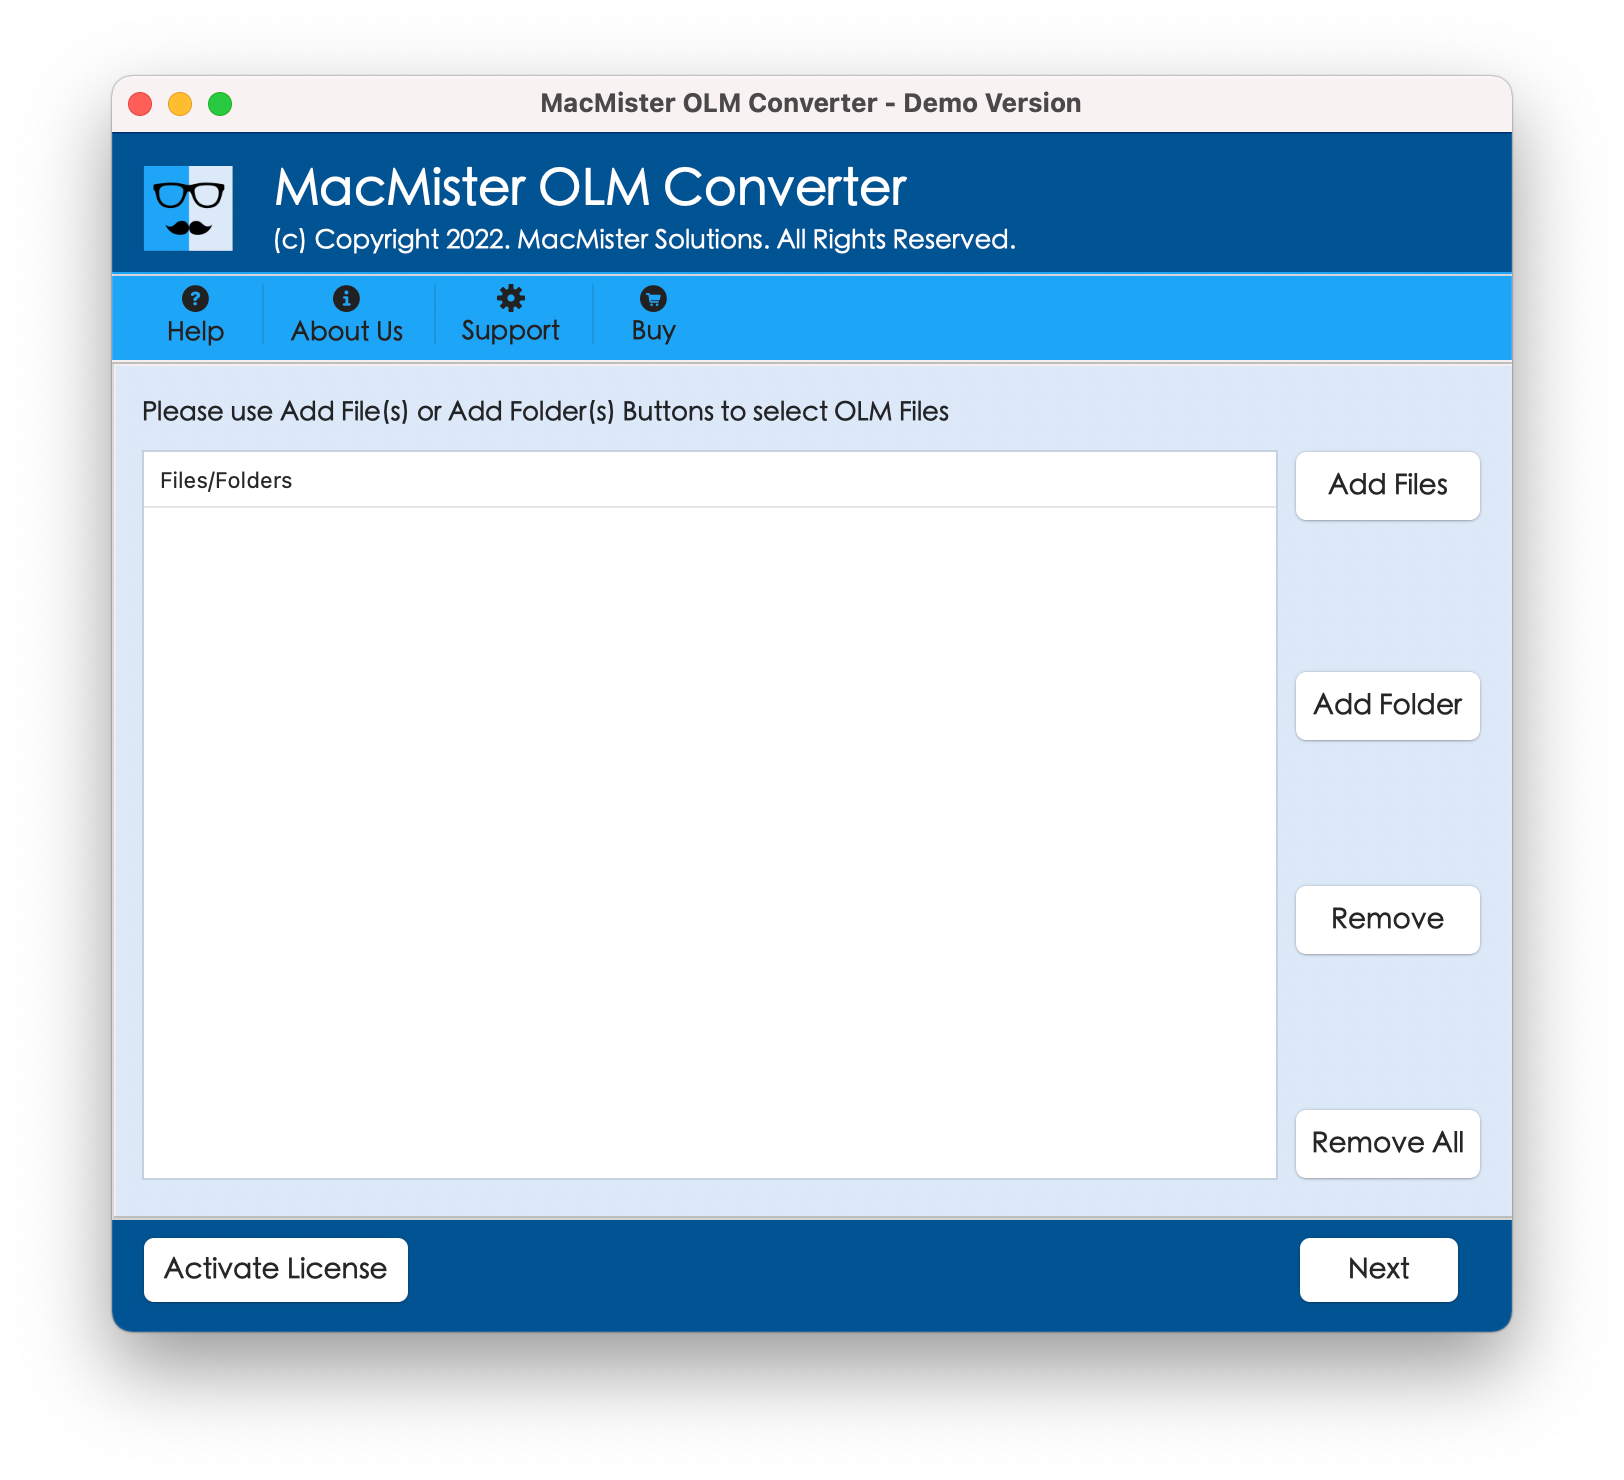
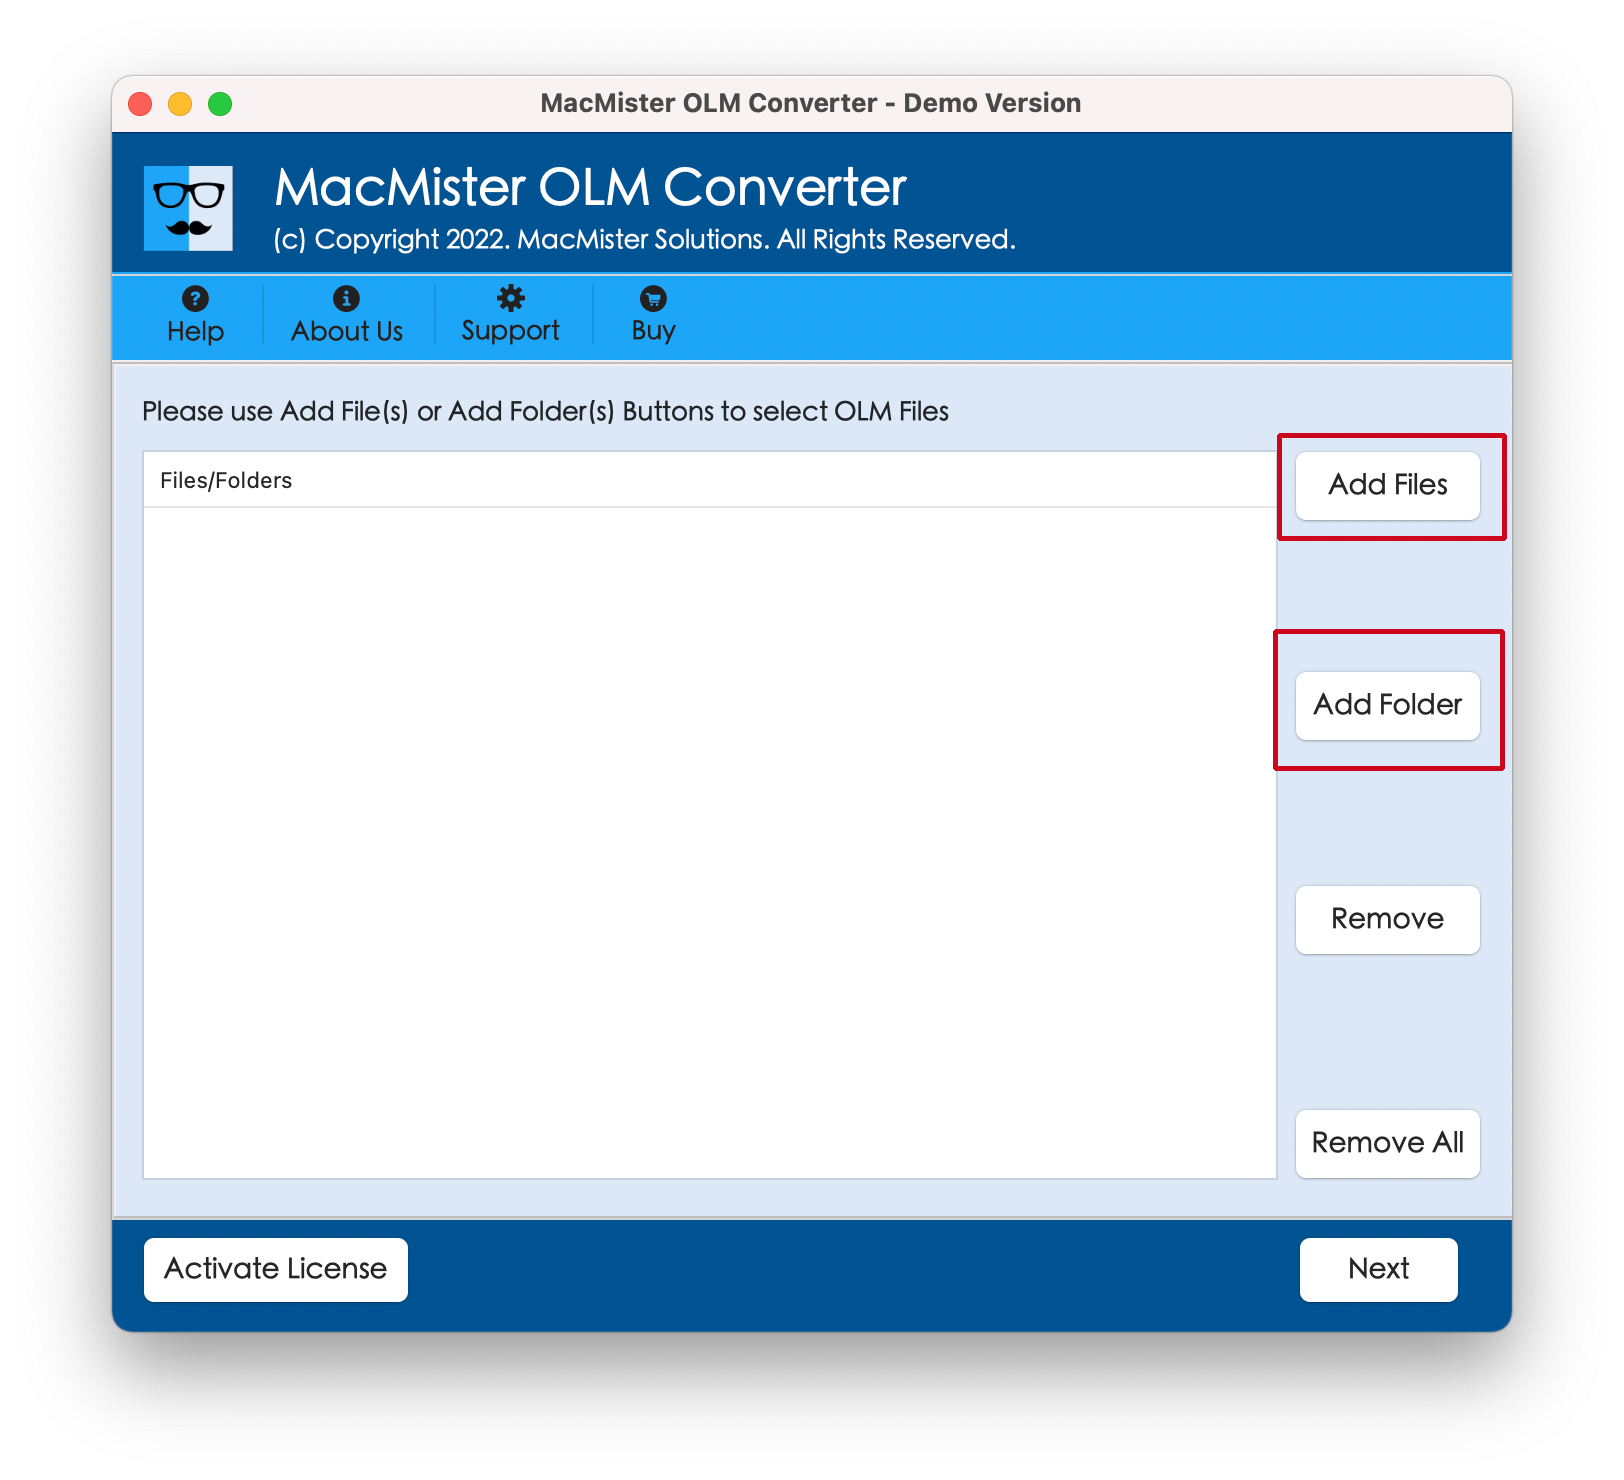
Step 2. Click on the Add File(s) option if you have few OLM files or make use of Add Folder option to add multiple OLM files folder on the tool. After adding the required OLM files, click Next.
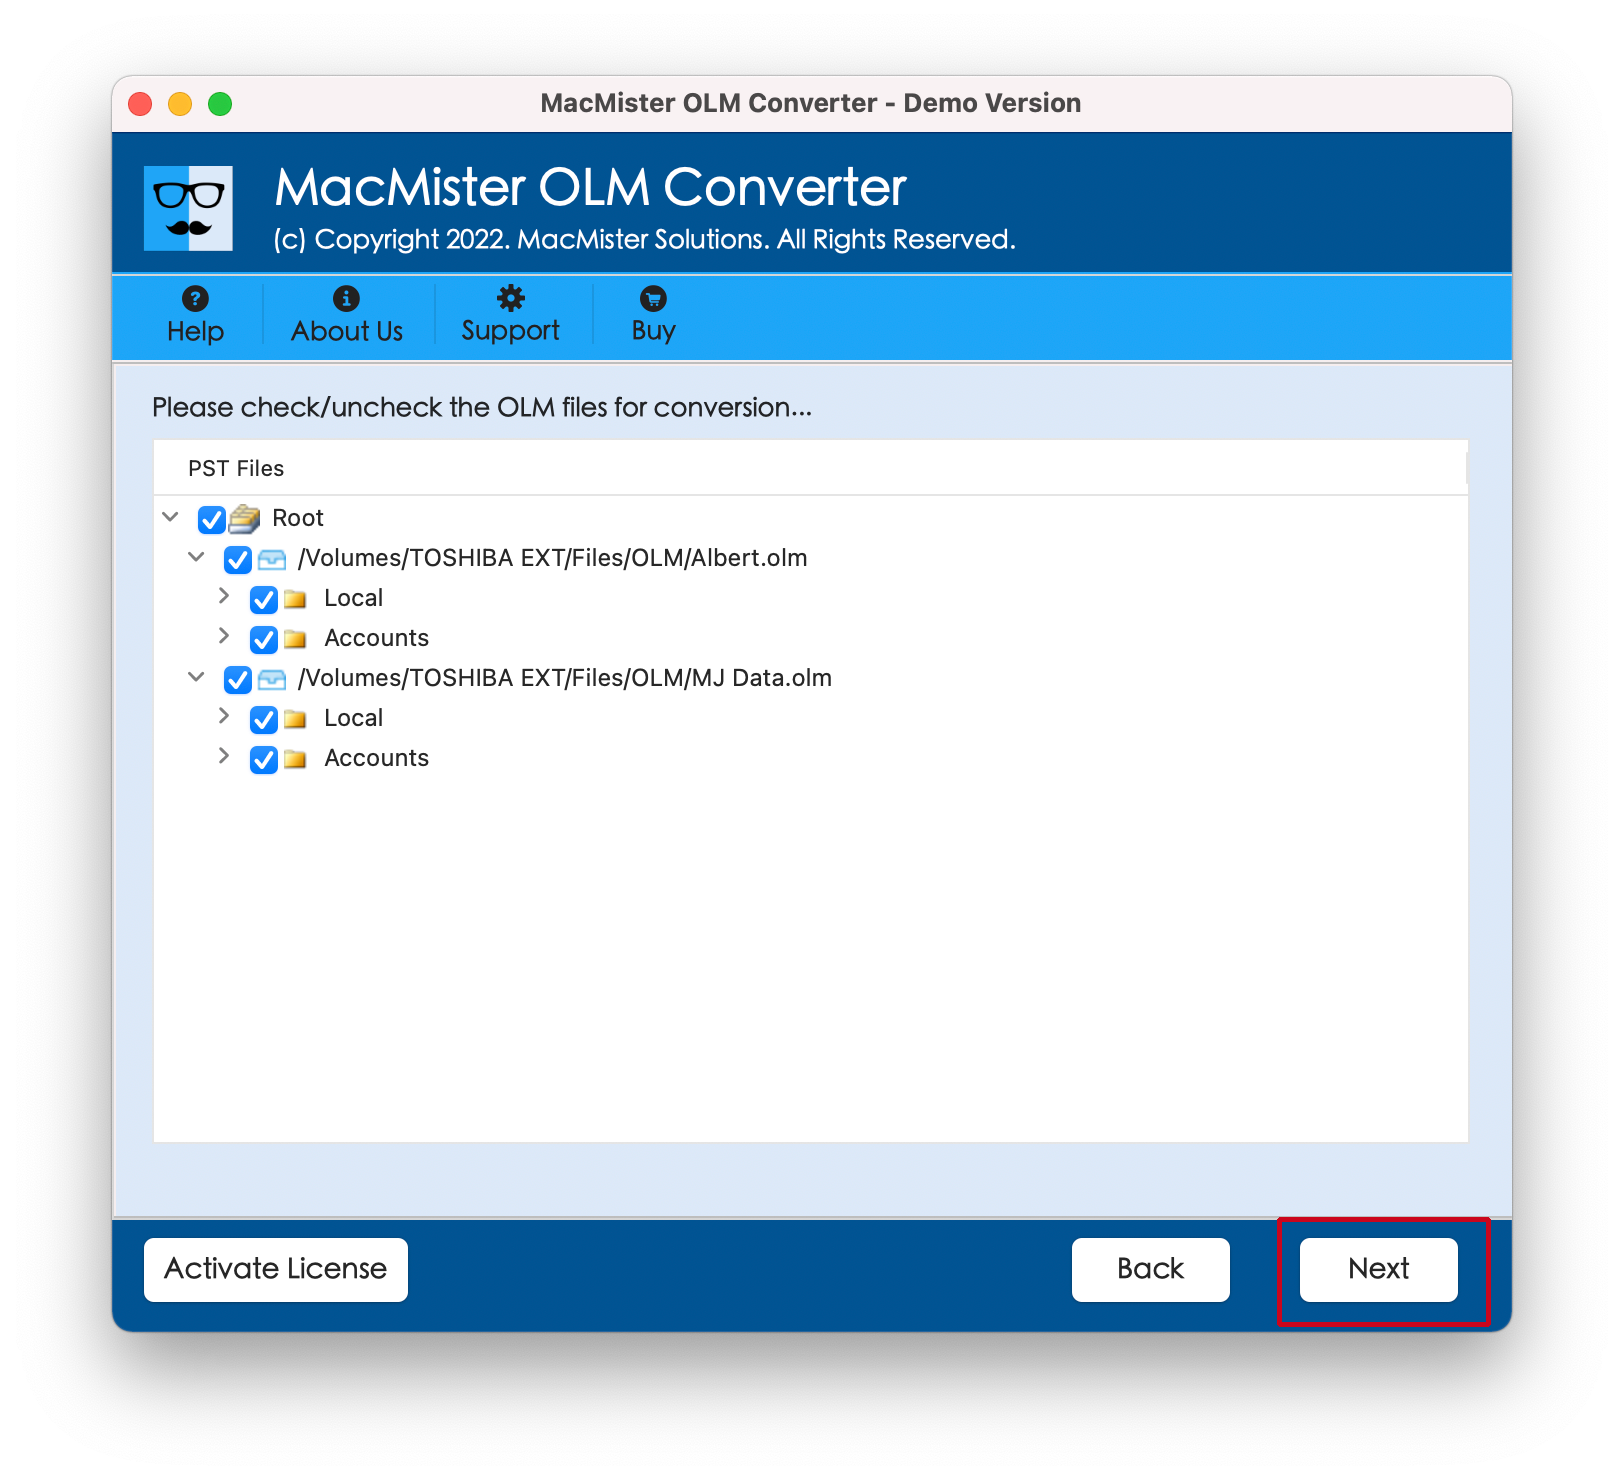
Step 3. The application will display OLM files with checkboxes on its pane. However, the checkboxes are already selected but users can deselect them and select according to their preferences, if required. Click Next to proceed.
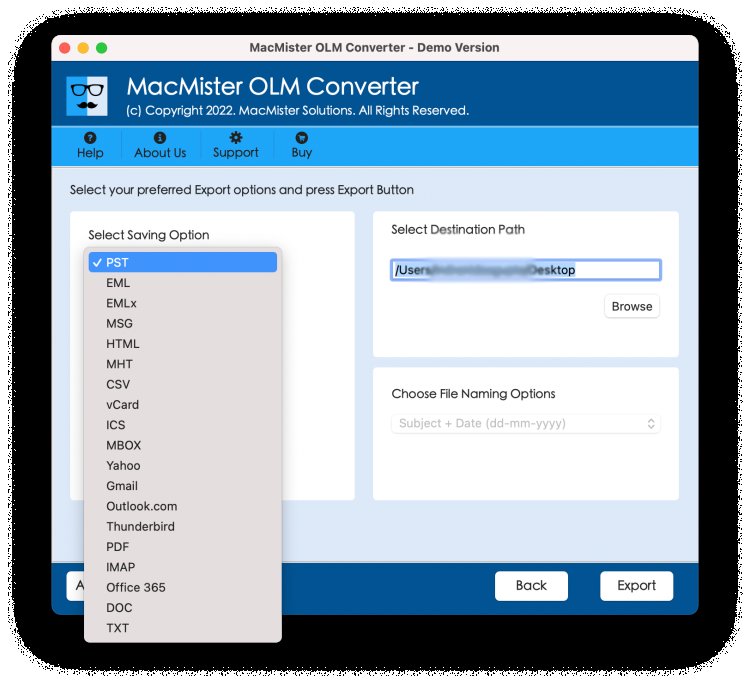
Step 4. Click Select Saving Options and choose MBOX format from the menu.
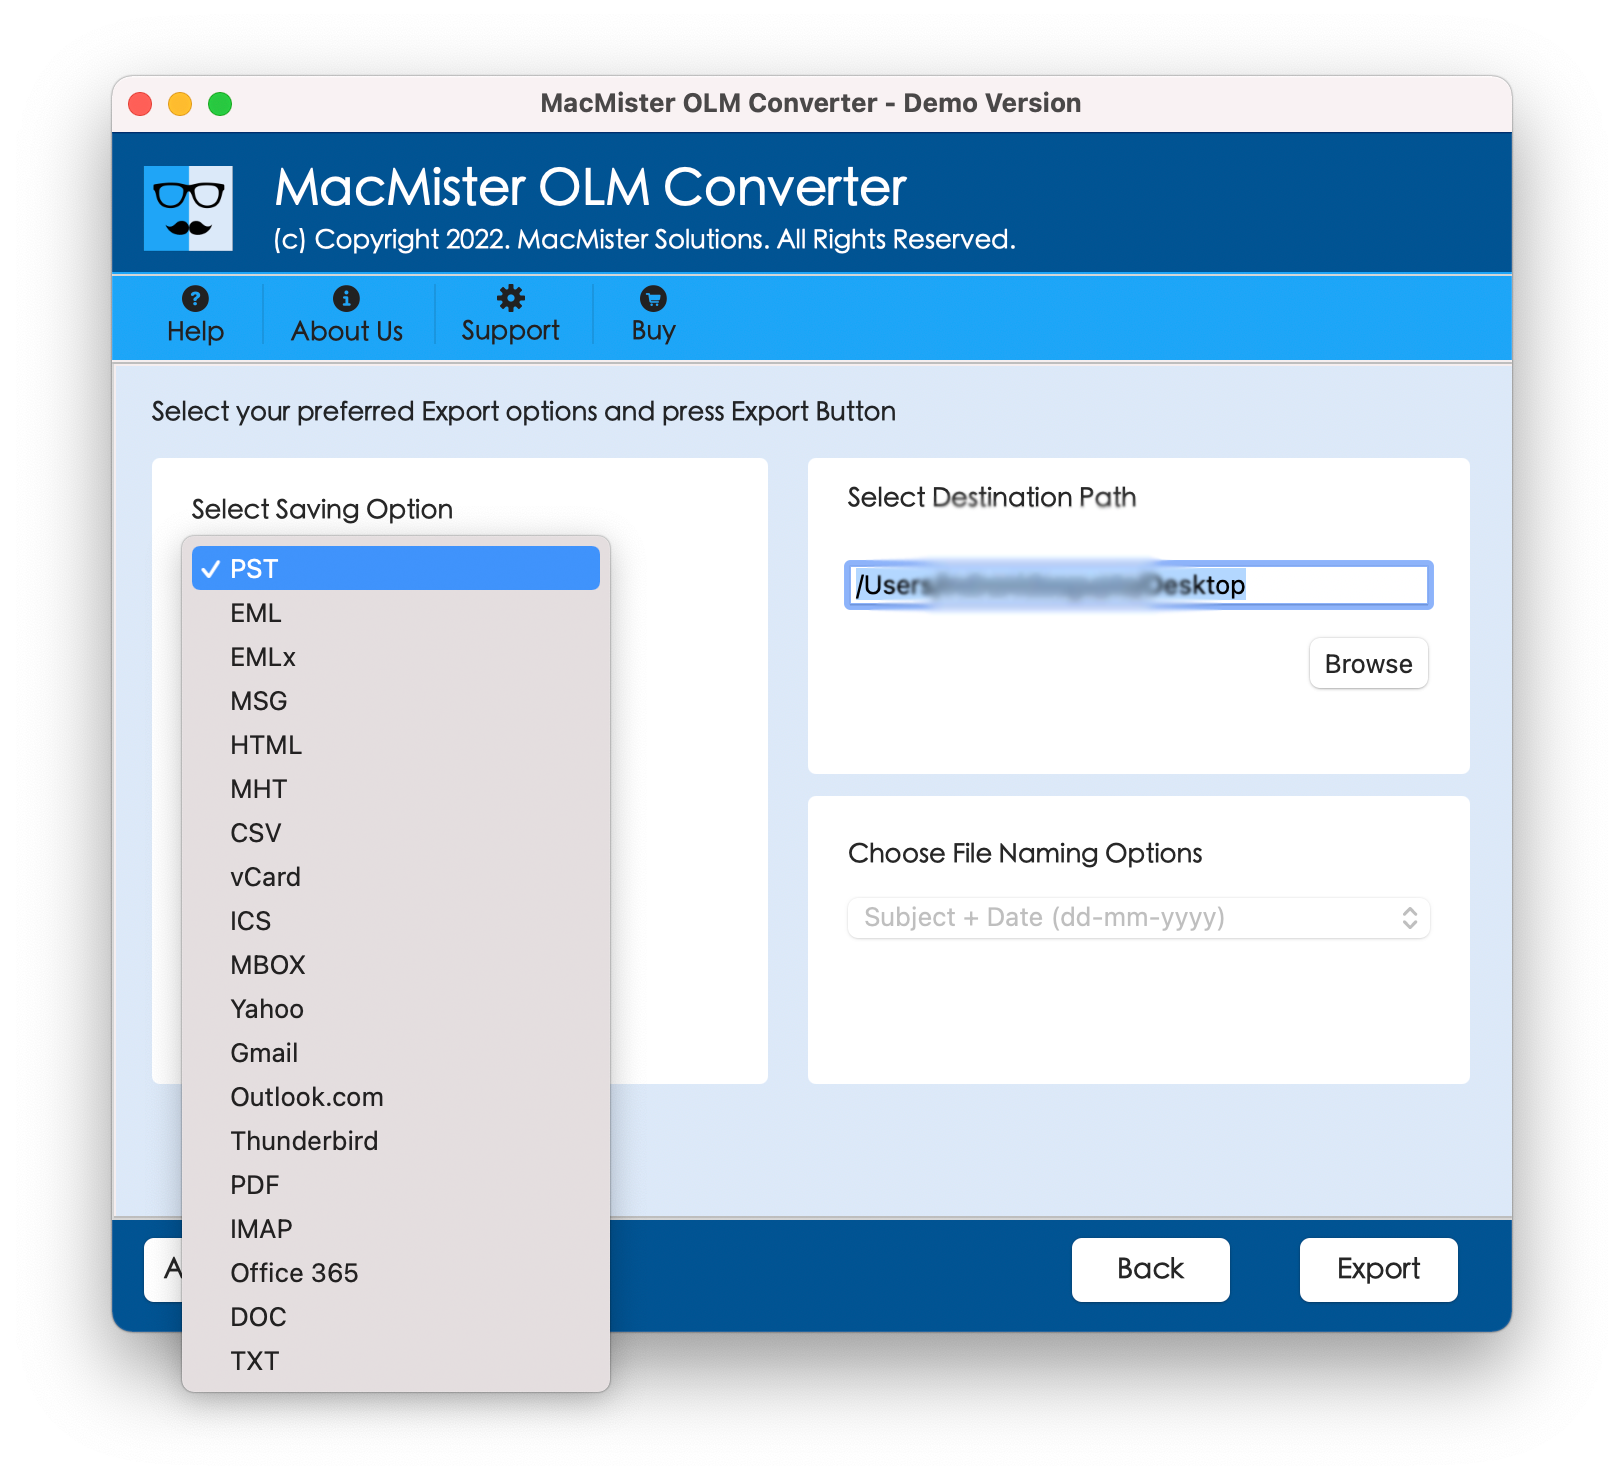
Step 5. Set MBOX options according to the requirements and click on Export button.
Step 6. Now, check the live process appearing on Live Conversion Report and track the export status of OLM files.
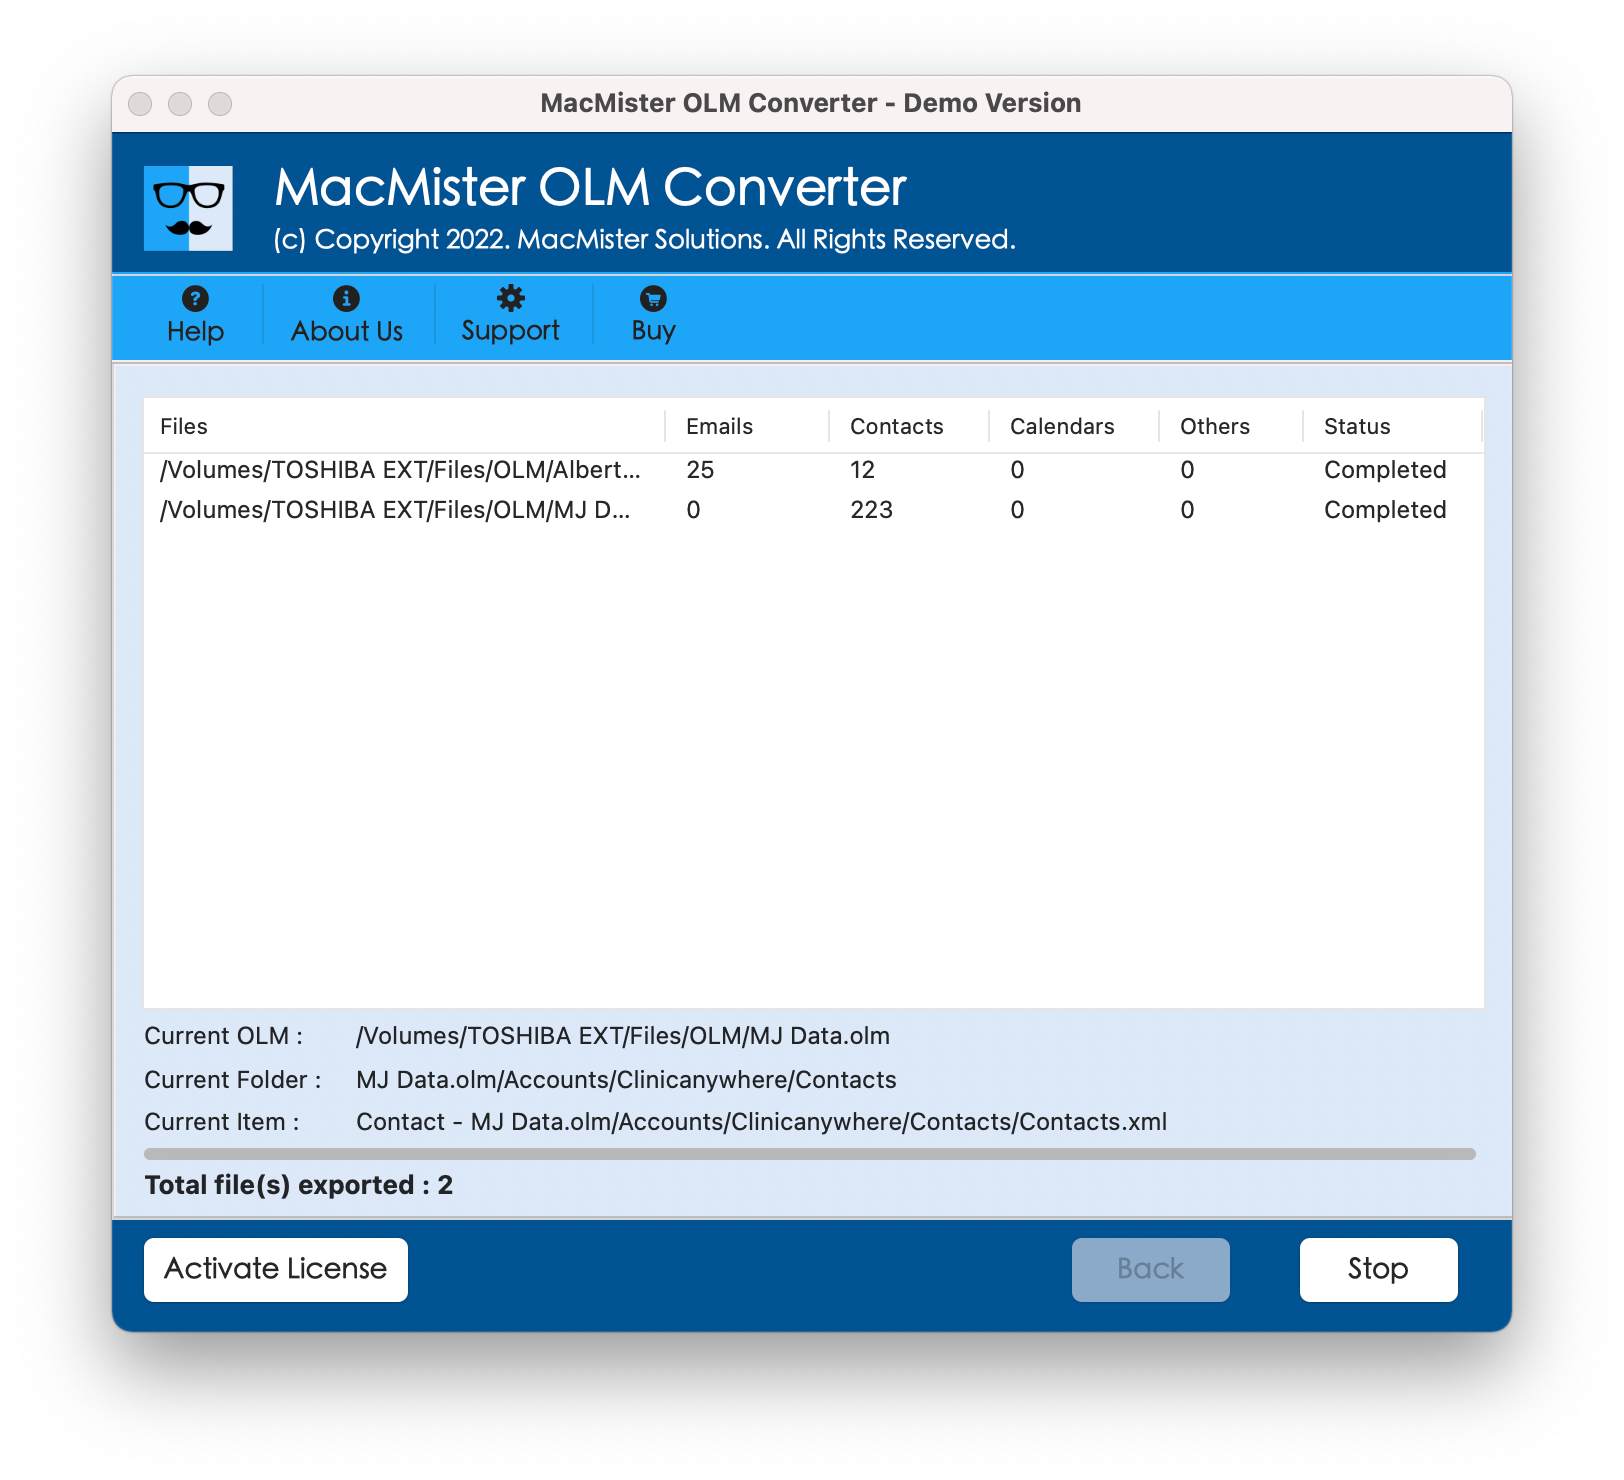
The process will finish within seconds and then show “Conversion Completed” message that confirms that the tool has successfully converted OLM files into MBOX. Now, open Apple Mail email account to import resultant MBOX files in the same.
Steps to Import Resultant MBOX files in Apple Mail on MacBook
Step 1. Open Apple Mail.
Step 2. Go to Files and tap Import Mailboxes… option.
Step 3. Continue by choosing Files in MBOX format option and click Continue.
Step 4. Go to the location where resultant files are saved. Select them and click Choose.
Step 5. Now, view the live import process.
Step 6. Click Done button and the Apple Mail will open email account.
Step 7. On the left navigation pane under On My Computer, the new Import folder will be generated.
Double-clicking the new Import folder will open Inbox folder which will show the count of converted emails. Again, click on the same to list all the converted emails on the screen. Now, choose the required email message for verification. However, you will see that the email content is completely accurate. It will appear with correct layout and formatting properties.
Conclusion
In the blog, we have discussed an instant and powerful solution to import Outlook for Mac folder to Apple Mail on MacBook. MacMister OLM Converter for Mac smoothly import OLM to Apple Mail and delivers the results without performing any modification in original content. The tool is however user-friendly and is easily operable by all types of users. Moreover, it has 15+ more saving options in which users can import Outlook for Mac OLM files such as PST, PDF, MSG, EML, EMLx, MHT, HTML, IMAP, Office 365, G Suite, Gmail, and more. To check the same, download its trial edition and import first 25 files from each Outlook for Mac folder free of cost.


