Easy to Install Kitchen Backsplash: A Simple Guide for Homeowners
Learn how to install a kitchen backsplash effortlessly with our step-by-step guide, transforming your space with style and ease.
Share this Post to earn Money ( Upto ₹100 per 1000 Views )
When it comes to giving your kitchen a quick facelift, nothing is as impactful and straightforward as installing a new backsplash. An easy-to-install kitchen backsplash not only enhances the visual appeal of your space but also adds a protective layer to your walls. Whether you're a seasoned DIY enthusiast or a beginner, this guide will walk you through everything you need to know about choosing and installing the perfect kitchen backsplash.
Why a Kitchen Backsplash Matters
Protection Meets Style
Any house has one of the most often utilized rooms—the kitchen. Your walls are stained, splashed, and spayed from all the cooking and food preparation. A well-installed kitchen backsplash protects your walls and gives your room some elegance at the same time.
Benefits of Choosing an Easy-to-Install Kitchen Backsplash
Choosing a simple-to-install kitchen backsplash has various benefits. Above all, it helps you to cut labor expenses. It also lets you finish the project at your own speed, therefore boosting your sense of success. Usually less time-consuming, the technique is a perfect choice for individuals who wish for a rapid kitchen renovation.
Types of Easy-to-Install Kitchen Backsplashes
Peel-and-Stick Backsplashes
Peel-and-stick backsplashes are a game-changer for anyone looking for a hassle-free installation. These self-adhesive tiles are available in various designs, mimicking the look of traditional tiles, metal, or even natural stone. They require no grout or mortar, making them an ideal choice for an easy-to-install kitchen backsplash.
Tile Sheets
Pre-ordered tiles set on a mesh backing make up tile sheets. They are easy to install since the mesh may be simply cut to suit around corners and outlets. Although they do call for some grout, their simplicity and speed make them a popular choice.
Beadboard Panels
Beadboard panels offer a classic look and are incredibly simple to install. These panels can be cut to size and glued directly onto your wall. They are perfect for creating a cottage or farmhouse-style kitchen, and because they cover a large area quickly, they’re a favorite for those seeking an easy-to-install kitchen backsplash.
Metal Backsplashes
Metal backsplashes like stainless steel or tin tiles are a great choice if you want a sleek, modern style. Often needing just adhesive and a few screws for a secure connection, these lightweight and easily handled materials are simple.
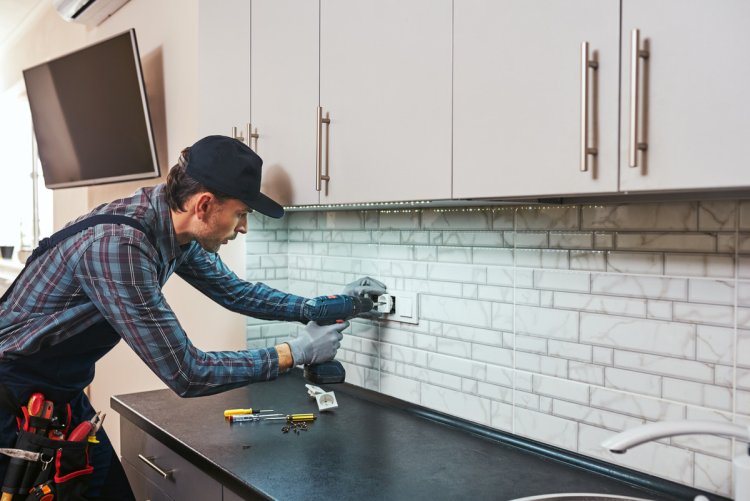
Step-by-Step Guide to Installing a Kitchen Backsplash
Tools and Materials You’ll Need
Before you start, gather the necessary tools and materials:
- Measuring tape
- Utility knife
- Level
- Adhesive or mortar
- Grout (if required)
- Sponge and bucket
- Tile cutter (if needed)
Preparing Your Kitchen Wall
A good installation depends much on preparation. Start by wiping the wall surface to get any grime or grease gone. Calculate the area to ascertain your material needs. Plot a level line where the backsplash will begin to guarantee a straight installation.
Installing Your Backsplash
- Peel-and-Stick: Start at the center of your wall and work outwards. Peel off the backing and press the tiles firmly onto the wall, smoothing out any bubbles as you go.
- Tile Sheets: Apply adhesive to the wall with a trowel, then press the tile sheet into place. Use spacers to ensure even grout lines and a level finish.
- Beadboard Panels: Cut the panels to fit the wall and apply a construction adhesive to the back. Press the panel against the wall and secure it with finishing nails.
- Metal Backsplashes: Apply adhesive to the back of the metal tiles and press them onto the wall. Use screws for additional support if needed.
Finishing Touches
Let the backlash set as directed by the manufacturer after it is in place. Mix the grout as directed by the box and apply it with a rubber float if you are using it. Once dry, seal the grout to stop discoloration; wipe away extra grout with a damp sponge.
Tips for a Successful DIY Backsplash Installation
Common Mistakes to Avoid
- Rushing the Job: Take your time to measure and plan before starting. Rushing can lead to uneven tiles and unsightly gaps.
- Skipping the Prep: A clean, smooth wall is crucial for a successful backsplash installation. Don’t skip the preparation steps.
Ensuring a Professional-Looking Finish
- Use a Level: Continuously check that your tiles or panels are level as you work.
- Proper Grout Application: Apply grout evenly and make sure it’s packed well between the tiles. This will ensure durability and a polished look.
How to Choose the Right Backsplash for Your Kitchen
Consider Your Kitchen’s Style
The backsplash should complement your kitchen’s existing design. For modern kitchens, sleek materials like metal or glass work well, while traditional kitchens might benefit from classic subway tiles or beadboards.
Durability and Maintenance
Choose a material that is easy to clean and maintain. Peel-and-stick tiles, for example, are low-maintenance and can be wiped clean with a damp cloth.
Budget Considerations
An easy-to-install kitchen backsplash doesn’t have to break the bank. Consider the cost of materials and any additional tools you may need before making your final decision.
Conclusion
One great approach to improve the utility and look of your kitchen is to install a backsplash. Choosing an easy-to-install kitchen backsplash will allow you to makeover your area in a weekend without needing kitchen professionals. Using the correct equipment, materials, and a little time will provide a professional-looking finish you'll be happy to show off.


