Vanilla Bean Yogurt Recipe
Discover how to prepare yummy vanilla bean yogurt at home using easy recipes and quality ingredients. Are you ready to make it a try? start here!
Share this Post to earn Money ( Upto ₹100 per 1000 Views )
DIY Vanilla Bean Yogurt Recipe
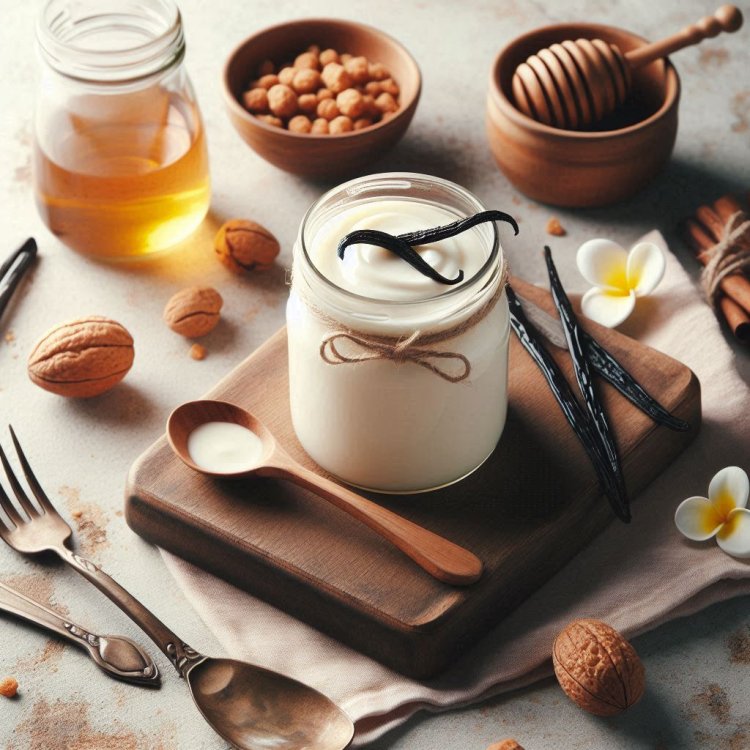
Yogurt is a versatile treat that can be enjoyed at any time of day, whether it's for breakfast, a snack, or dessert. Have you ever thought about making your own? Crafting homemade vanilla bean yogurt is not only delicious but also allows you to control exactly what goes into it. This recipe walks you through the simple steps to create fresh, flavorful yogurt in your kitchen.
.jpeg)
What You’ll Need
Make sure you have the following before you begin:
● Milk: Whole milk is ideal for a rich, creamy texture, but any type of milk—low-fat, almond, or coconut—will work.
● Vanilla Beans: The key to that deep, aromatic flavor. Organic vanilla beans or vanilla bean powder are far superior to extracts in this recipe.
● Yogurt Starter: You can use a bit of plain yogurt from your previous batch or a store-bought yogurt that contains live cultures.
● Sweeteners (optional): Honey, maple syrup, or sugar can be added to taste if you prefer sweeter yogurt.
Step-by-Step Instructions
- Get Ready: Start by gathering your ingredients and making sure your utensils and containers are clean. Proper sterilization is important to prevent any unwanted bacteria from affecting your yogurt.
- Heat the Milk: Pour your milk into a heavy pot and place it on the stove over medium heat. Stir occasionally to prevent scorching. Heat until the milk reaches about 180°F (82°C), just as it begins to steam and froth lightly. This kills any undesirable bacteria and helps the yogurt set properly.
- Add Vanilla: As the milk heats, slice the organic vanilla bean lengthwise and scrape out the seeds. Stir both the seeds and the pod into the milk. This infuses a rich vanilla flavor into the yogurt. If you prefer a milder flavor, you can remove the pod before the next step.
- Cool the Milk: Let the milk cool down to about 110°F (43°C). This temperature is perfect for adding the yogurt starter culture, ensuring the beneficial bacteria can thrive without being harmed by excessive heat.
- Introduce the Starter: Once the milk has cooled, whisk in your yogurt starter until it’s fully blended. This step is crucial as it kickstarts the fermentation process.
- Incubate: Pour the milk mixture into clean jars or containers, then cover them. Keep them in a warm, draft-free place to incubate. Ideally, the temperature should stay around 110°F (43°C). You can use a yogurt maker, an oven with the light on, or wrap the jars in towels to maintain the warmth. Let it sit for 6 to 12 hours, depending on how tangy you like your yogurt.
- Chill: Once your yogurt has set to your liking, move it to the refrigerator to cool. This helps thicken the yogurt and deepen its flavor.
- Customize: You can enjoy your yogurt plain, or add your favorite sweeteners like honey or maple syrup. Fresh fruits, nuts, or granola also make excellent additions for extra flavor and texture.
Pro Tips
● Milk Matters: Whole milk creates the creamiest yogurt, but don’t hesitate to experiment with non-dairy milks if you prefer.
● Keep It Clean: Sterilizing your equipment is key to successful yogurt-making, as it prevents contamination.
● For Thicker Yogurt: Strain your yogurt after incubation to remove extra whey or add a bit of powdered milk during heating.
Mistakes to Avoid
● Overheating: Heating milk too much can lead to a curdled consistency, so stick to the recommended temperature.
● Insufficient Incubation: If your yogurt is too mild, it may not have incubated long enough.
● Weak Starter: Make sure your starter yogurt is fresh and contains live cultures for the best results.
Why Make Yogurt at Home?
● Ingredient Control: You decide what goes into your yogurt—no preservatives or unnecessary additives.
● Better Taste: Homemade yogurt often has a richer, fresher taste than store-bought versions.
● Cost-Effective: If you eat yogurt regularly, making it at home can save you money in the long run.
Creative Variations
● Fruit Toppings: Add homemade fruit compotes like berry, peach, or apple for a flavor boost.
● Honey and Nuts: A drizzle of honey and a handful of nuts adds crunch and sweetness.
● Spices: Try mixing in cinnamon, cardamom, or nutmeg for a spiced yogurt variation.
Storage and Shelf Life
● How Long It Lasts: Homemade yogurt can stay fresh in the fridge for up to two weeks.
● Storage Tips: Store yogurt in a sealed container in the coldest part of your fridge. Always use clean utensils to avoid contamination.
Health Benefits
● Probiotics: Yogurt is packed with probiotics, which are great for digestive health.
● Nutrition: Homemade yogurt is high in protein, calcium, and essential vitamins.
● Less Sugar: You control the sugar content, making homemade yogurt a healthier choice than many store-bought options.
Serving Suggestions
● Breakfast: Layer yogurt with granola, fresh fruit, and nuts for a nutritious start to your day.
● Smoothies: Blend yogurt into smoothies for a creamy texture and added probiotics.
● Desserts: Use it as a base for parfaits or as a topping for pies and cakes
Check out our premium vanilla bean products to add even more flavor to your homemade yogurt.Conclusion
Making your own vanilla bean yogurt at home is a fun and rewarding process. The result is a creamy, flavorful yogurt that you can customize to suit your tastes, making it well worth the effort. Enjoy!


