How to Build and Test Websites Locally Using wmWebStack
Building and testing websites locally is an essential practice for web developers. It allows you to work on your projects in a controlled environment before deploying them to a live server
Share this Post to earn Money ( Upto ₹100 per 1000 Views )
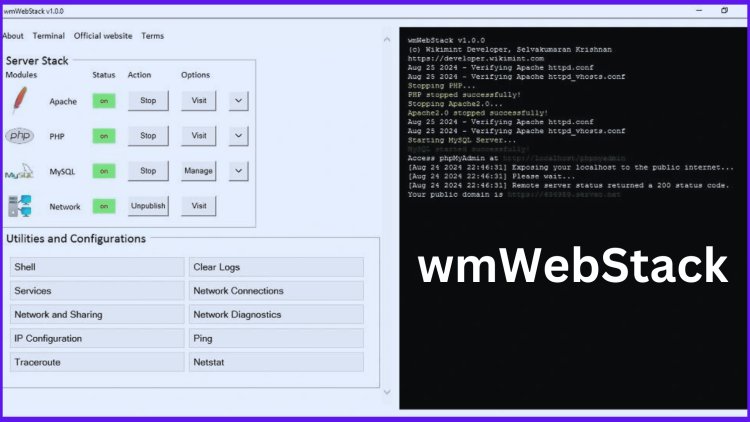
Building and testing websites locally is an essential practice for web developers. It allows you to work on your projects in a controlled environment before deploying them to a live server. wmWebStack is a powerful and easy-to-use tool for setting up a local server environment on Windows, which includes Apache, MySQL, and PHP. This guide will walk you through the process of building and testing websites locally using wmWebStack.
1. Install wmWebStack
Download and Install
-
Download wmWebStack: Visit the official wmWebStack website and download the latest version for Windows.
-
Run the Installer: Double-click the downloaded
.exefile to start the installation process. Follow the prompts in the installation wizard:- Choose the installation directory (the default is usually fine).
- Ensure that Apache, MySQL, PHP, and phpMyAdmin are selected.
- Click “Install” to complete the installation.
-
Launch wmWebStack: Once installed, open wmWebStack from your Start menu or desktop shortcut.
2. Configure wmWebStack
Set Up Apache
-
Access the Control Panel: Open the wmWebStack control panel.
-
Modify Apache Configuration (if needed):
- Click the "Config" button next to Apache to open the
httpd.conffile. - Change settings such as the port number if necessary (e.g.,
Listen 8080if port 80 is in use).
- Click the "Config" button next to Apache to open the
Set Up MySQL
-
Configure MySQL:
- Click the "Config" button next to MySQL to open the
my.inifile if you need to make changes (e.g., adjust memory limits).
- Click the "Config" button next to MySQL to open the
-
Set a Root Password:
- Open phpMyAdmin by navigating to
http://localhost/phpmyadminin your browser. - Log in with the default username
root(no password). - Set a new root password under the "User Accounts" tab for security.
- Open phpMyAdmin by navigating to
3. Create and Manage Projects
Set Up Project Directory
-
Create a Project Folder:
- Navigate to the
wwwdirectory in your wmWebStack installation folder (usuallyC:\Program Files\wmWebStack\www). - Create a new folder for your project (e.g.,
mywebsite).
- Navigate to the
-
Add Project Files:
- Inside your project folder, create an
index.phpfile or any other necessary files for your project. - For example, a simple
index.phpfile might contain:
phpecho "Welcome to My Local Website!"; - Inside your project folder, create an
Access Your Project
- Open in Browser:
- Navigate to
http://localhost/mywebsitein your web browser to view your project.
- Navigate to
4. Set Up a Database
Create a Database
-
Open phpMyAdmin: Go to
http://localhost/phpmyadmin. -
Create a New Database:
- Click on the "Databases" tab.
- Enter a name for your database (e.g.,
mydatabase) and click "Create."
-
Create Tables:
- Select your database from the sidebar.
- Use the "SQL" tab to run queries and create tables as needed.
Connect Database to Your Project
-
Database Configuration:
- In your project’s configuration files (e.g.,
config.php), set up the database connection. For example:
php$servername = "localhost"; $username = "root"; $password = "yourpassword"; $dbname = "mydatabase"; // Create connection $conn = new mysqli($servername, $username, $password, $dbname); // Check connection if ($conn->connect_error) { die("Connection failed: " . $conn->connect_error); } echo "Connected successfully"; - In your project’s configuration files (e.g.,
5. Test Your Website Locally
Debugging
-
Check for Errors:
- Use the error logs in wmWebStack (found in the Apache
logsdirectory) to troubleshoot issues. - Enable PHP error reporting by adding the following to your
php.inifile:
inierror_reporting = E_ALL display_errors = On - Use the error logs in wmWebStack (found in the Apache
-
Test Functionality:
- Test all features of your website to ensure that everything works as expected.
- Use browser developer tools to inspect and debug client-side issues.
Performance Testing
- Monitor Performance:
- Test your site’s performance locally to identify any bottlenecks or issues.
- Use tools like Xdebug for profiling PHP code and MySQL's slow query log to monitor database performance.
6. Deploy Your Project
Prepare for Deployment
-
Export Database:
- Use phpMyAdmin to export your database to an SQL file for use in a production environment.
-
Upload Files:
- Transfer your project files to your live server using FTP/SFTP or another deployment method.
-
Import Database:
- Import your database into the live server’s MySQL instance using phpMyAdmin or command-line tools.
Final Testing
- Test on Live Server:
- Once deployed, thoroughly test your website on the live server to ensure everything works as expected.
Conclusion
Using wmWebStack for local web development provides a powerful, open-source solution that simplifies the process of building, testing, and managing your projects. With its all-in-one package including Apache, MySQL, PHP, and phpMyAdmin, wmWebStack makes it easy to set up a local server environment on Windows. By following the steps outlined in this guide, you can effectively develop and test your websites locally, ensuring a smooth transition to your live server and a successful deployment.