Create Your Own Stencil | A Step by Step Guide
A stencil is a thin sheet of material with a pattern or design cut out of it. When placed over a surface, paint or ink can be applied through the cutouts.
Share this Post to earn Money ( Upto ₹100 per 1000 Views )
Stenciling is a versatile and accessible technique that allows individuals to create precise designs and patterns on various surfaces. Whether you're looking to add a personal touch to your home décor, customize clothing, or create professional signage, stencils provide a cost-effective and creative solution. In this guide, we’ll walk you through the process of creating your own stencil, from choosing the design to executing the final project. By the end, you’ll have the knowledge and skills to make stencils that suit any DIY project.
What Is a Stencil?
A stencil is a thin sheet of material with a pattern or design cut out of it. When placed over a surface, paint or ink can be applied through the cutouts, transferring the design to the material beneath. Stencils are often used in arts and crafts, home décor, fashion, and even industrial applications. The beauty of stencils lies in their repeatability—once you’ve created a stencil, you can use it multiple times to recreate the same design with perfect precision.
Why Make Your Own Stencil?
While pre-made stencils are readily available, making your own offers several advantages:
-
Customization: You can create unique designs tailored to your specific project.
-
Cost-Effective: Making a stencil from household materials or inexpensive supplies is often cheaper than buying one.
-
Creative Control: You have complete control over the size, shape, and intricacy of your stencil.
-
Versatility: Stencils can be used on various surfaces, including fabric, wood, walls, and paper.
Whether you’re working on a large mural or small craft project, making your own stencil allows you to express your creativity without the limitations of pre-made designs.
Materials You’ll Need
Before you begin Create Your Own Stencil, gather the following materials:
-
Stencil Material: This can be anything from thin plastic sheets (Mylar or acetate) to cardboard, wax paper, or even freezer paper, depending on your project.
-
Cutting Tools: A precision craft knife (like an X-Acto knife) or sharp scissors will help you cut out your design.
-
Cutting Surface: Use a cutting mat or thick cardboard to protect your work surface while cutting.
-
Pencil and Eraser: To sketch out your design or trace printed designs.
-
Ruler: For straight lines and measurements.
-
Adhesive (Optional): Spray adhesive or painter’s tape to secure the stencil while you paint.
-
Paint/Ink: Choose the appropriate medium for your project—acrylic paint for wood or walls, fabric paint for textiles, or spray paint for larger surfaces.
Choosing the Right Stencil Material
The material you choose for your Custom Large stencils depends on the type of project you’re working on:
-
Mylar or Acetate Sheets: These are ideal for creating durable, reusable stencils. They’re thin, flexible, and easy to cut, making them perfect for detailed designs.
-
Cardstock: If you're working on a one-time project, cardstock or thick paper is a budget-friendly option. However, it may wear out quickly, especially when exposed to moisture.
-
Freezer Paper: For fabric projects, freezer paper is a great option. It has a waxy side that temporarily adheres to the fabric when ironed, preventing the paint from bleeding.
-
Vinyl: Adhesive vinyl is another excellent option for fabric and wood stencils, as it sticks to the surface and can be peeled away cleanly.
Designing Your Stencil
The design process is perhaps the most important part of creating your own stencil. Here are the steps to follow:
Brainstorm Your Design
Start by thinking about what you want your stencil to depict. Do you want a complex pattern, a simple geometric shape, or a detailed image? Think about where and how you’ll use the stencil—this will help guide your design choices.
Keep It Simple (Especially for Beginners)
If you're new to stenciling, it's best to start with a simple design. Basic shapes, letters, and bold patterns are easier to cut and paint. As you gain more experience, you can gradually move on to more intricate designs.
Consider Bridges and Islands
Stencils work by leaving certain areas open (the part where paint will pass through) and certain areas blocked off (where the surface remains unpainted). Keep in mind that any enclosed shapes (like the center of a letter "O") need "bridges" to remain intact. Plan these connections carefully so that your design stays functional.
Trace or Print Your Design
Once you’ve finalized your design, you can either draw it freehand on the stencil material or print it out. For more complex designs, it’s a good idea to print the image on paper and then transfer it onto your stencil material by tracing.
Cutting Your Stencil
Now that your design is ready, it’s time to cut it out. Follow these tips for precision cutting:
Secure Your Material
Place your stencil material on a cutting mat or a thick piece of cardboard to protect your workspace. Secure the material in place with painter's tape if needed.
Use a Sharp Knife
Use a precision craft knife for clean and accurate cuts. Apply gentle pressure and follow the lines of your design carefully. If you're working with a simple design, scissors may suffice, but a knife will give you more control for intricate patterns.
Take Your Time
Cut slowly and deliberately to avoid mistakes. If you need to cut out small or detailed areas, use a ruler to help guide straight lines or curves. Don't rush this step, as precision is key to a successful stencil.
Using Your Stencil
Now that you’ve created your stencil, it’s time to put it to use. Here’s how to apply your stencil to different surfaces:
Securing the Stencil
Position the stencil on your surface and secure it in place using painter's tape or spray adhesive. For fabric or uneven surfaces, an adhesive is more effective at preventing the stencil from shifting.
Applying Paint or Ink
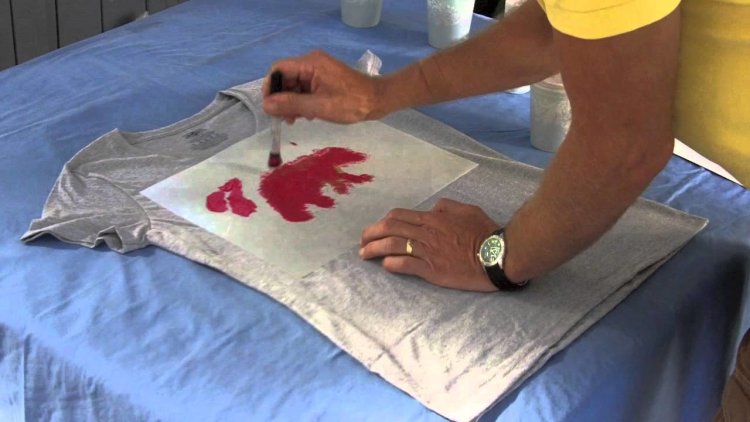
Once your stencil is secure, apply your paint or ink. Use a stencil brush, foam roller, or spray paint, depending on your project. If you're using a brush, apply the paint in a dabbing motion rather than a sweeping motion to prevent the paint from seeping under the stencil.
Remove the Stencil
After applying the paint, carefully lift the stencil away from the surface while the paint is still wet. This will prevent the stencil from sticking to the surface and smudging the design.
Repeat as Needed
If you're creating a repeating pattern, reposition the stencil and continue the process until you’ve covered the entire area.
Tips for Achieving the Best Results
-
Test Your Stencil: Before using your stencil on the final surface, test it on scrap material to ensure the design transfers correctly.
-
Use Minimal Paint: Less is more when stenciling. Applying too much paint can cause bleeding under the stencil edges.
-
Clean Your Stencil: If you plan to reuse your stencil, clean it immediately after use. For plastic or vinyl stencils, warm water and soap work well.
Conclusion
Creating your own stencil is a rewarding and creative endeavor that opens up endless possibilities for customization and personalization. With just a few simple materials and a bit of patience, you can produce professional-looking designs tailored to your needs. Whether you’re decorating a wall, customizing a t-shirt, or working on a craft project, a homemade stencil allows you to make your mark in a unique way. Happy stenciling!


